DIY Easy-Sew Baby Harem Bloomers
/Posted by Lovely Indeed
You’d think that I was a regular Donna Reed up in here, sewing all of these goodies for baby girl! Truth be told, I only sew if it’s easy. So you can rest assured that none of these sewing projects are terribly scary in any way. In fact, if you can sew in a straight line you can tackle these. And I can’t stand how cute these little bloomers turned out, so I’ll probably end up making her a bunch more of them. It was also another chance to use my new EverSewn machine, which I’m completely smitten with. I realized as I was sewing these the other day that I was doing it while Ryan was on a work call in the same room and it was totally quiet! My old machine was crazy loud but this one barely makes a peep. Like, I could sew these in the same room while the kids were napping and I would still be golden. I’m into that.
Materials
Soft fabric with some give. You could use the front and back of an old t-shirt, or a woven skirt, or just grab something cute at the fabric store. If you’re measuring yardage, I’d get 1/3 yard to be safe. You could probably get away with 1/4 yard if you’re reaaaallllly careful how you cut.
1/2″ elastic
1/8″ elastic
Sewing machine and notions
Scissors
Safety pins
Iron
Make Time: 1 Hour
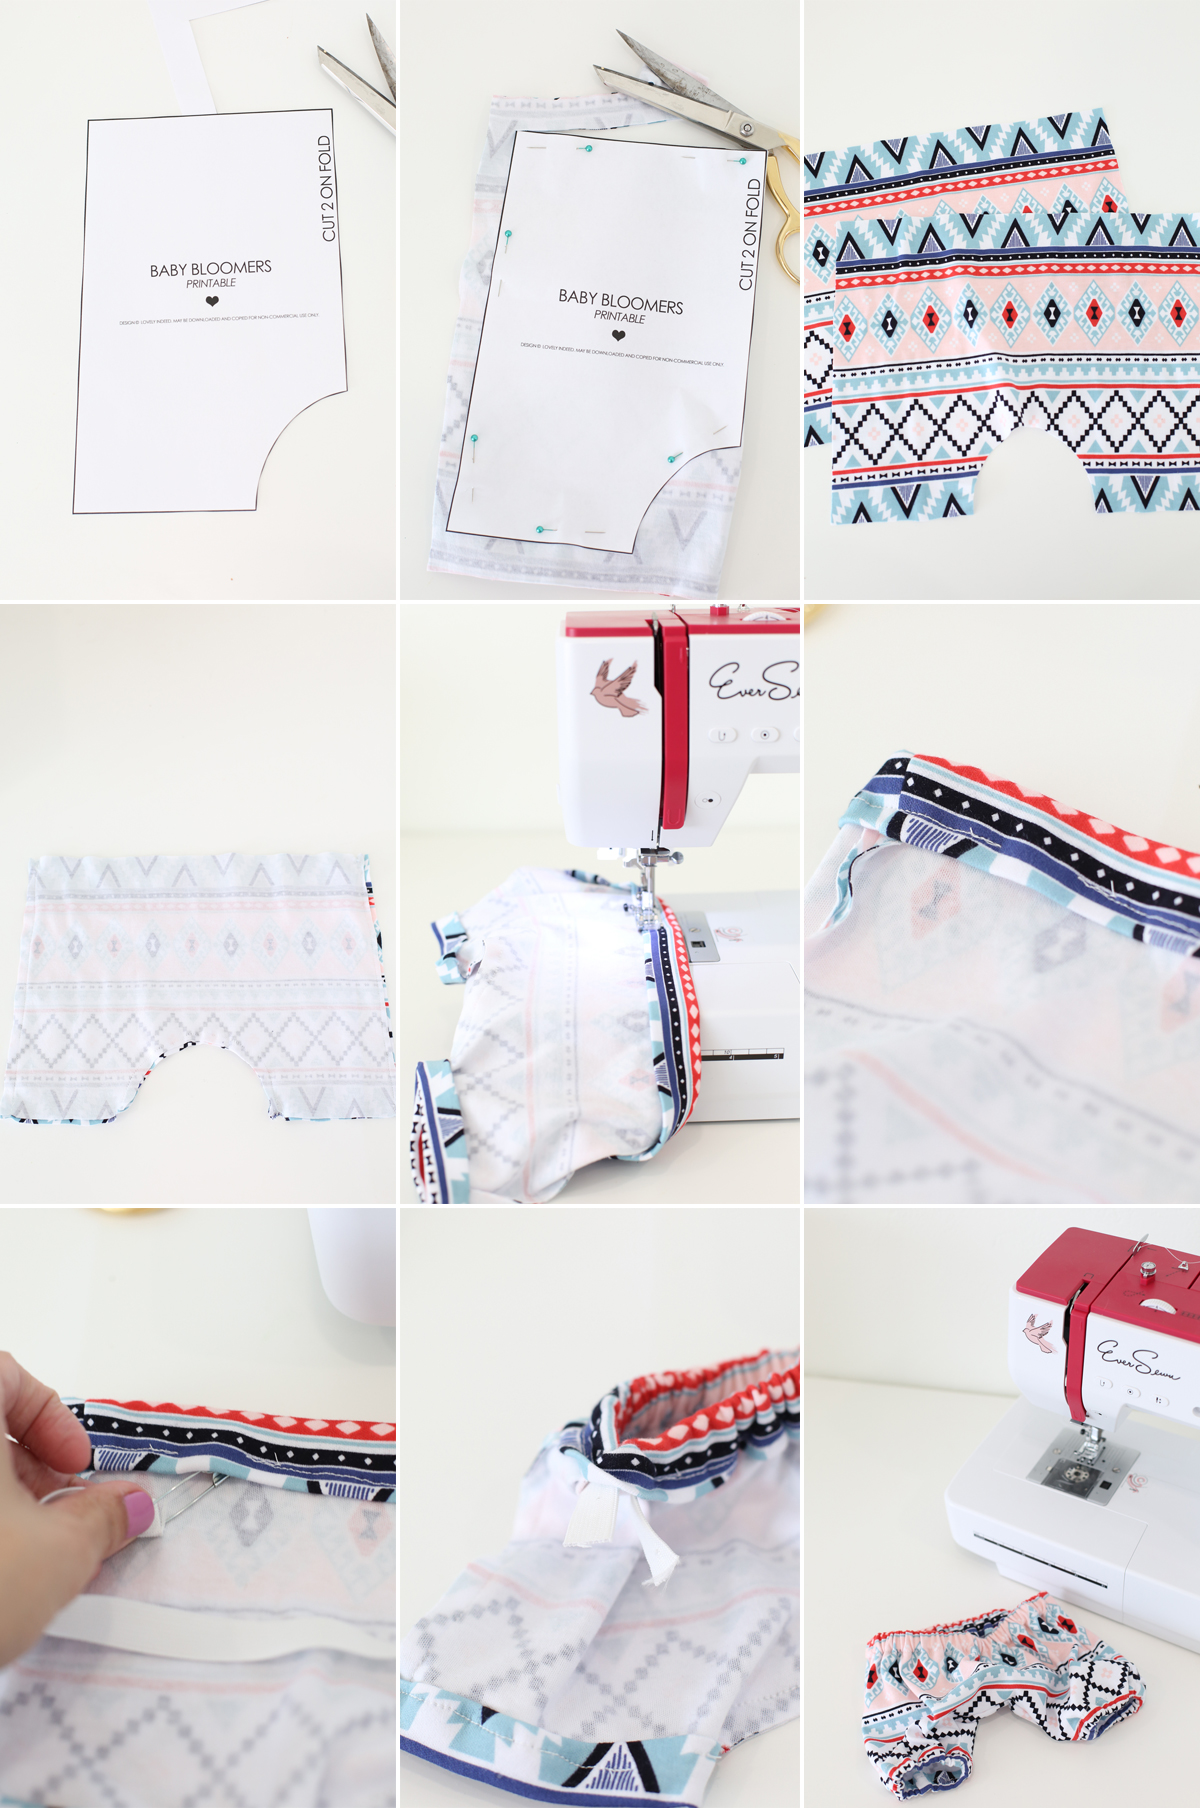
Step 1: Print our bloomers pattern and cut out along the black outer line.
Step 2: Fold your fabric in half, being sure to arrange any patterns in the direction you’d like. Place the folded edge against the line on the pattern that says “Cut 2 On Fold.” Pin the pattern to the fabric and cut around the edges (do not cut your fold apart). Repeat this so that you have two identical pieces.
Step 3: Place right sides together and pin the two pieces to each other. Sew a straight stitch down both sides and around the crotch.
Step 4: On the waistband, fold over 3/4″ and fold again so that the raw edge is hidden. Iron in place. Repeat on both leg holes, only folding over 1/2″ each time.
Step 5: Sew a straight stitch around the waist and leg holes, leaving a 1″ opening on each hole through which you’ll insert the elastic.
Step 6: For the waist, cut 15″ of 1/2″ elastic. Attach a safety pin to one end and fish it through the open hole, all the way around the waist, and back out the same open hole.
Step 7: Overlap the ends of the elastic by about 1/2″ and sew them together.
Step 8: Pull the elastic entirely inside the waist casing and sew the open 1″ of casing closed.
Step 9: Repeat Steps 6-8 for each leg hole. For each hole, use 7″ of 1/8″ elastic.
Step 10: Flip the bloomers right side out, adjust the elastic so that it’s evenly spread, and put those babies on your baby!
Just a note — for sewing the 1/8″ elastic ends together, it’s easiest if you just lay them on top of each other with the ends pointing the same direction. Place them under the sewing machine’s presser foot. I then used my EverSewn machine’s auto-lock button, which sews a few locking stitches right in place. Way easier than trying to stitch a line down that tiny elastic! Another reason I love this new machine. Also, FYI — this pattern is sized for a little one that’s 0-3 months. So if you want to size it up, just enlarge the pattern to your kiddo’s size.
So! In just about a week’s time these little bloomers will be filled with some fresh baby buns and I cannot wait. Until then, stay tuned for one more simple sewing tutorial, coming soon!


